RECIPES
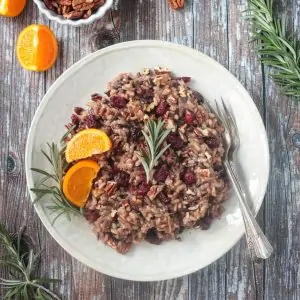
Cranberry Pecan Wild Rice Salad
This recipe is hearty and full of plant-based protein, yet lighter than most holiday sides. It’s vegan, gluten free, and so tasty! Sweet, tangy and protein packed, this side dish is perfect for the holidays. This would make a perfect light autumn main meal as well. Hearty and filling!
Prep Time: 5 mins Cook Time: 50 mins
Total Time: 55 mins
Servings: 6
Calories: 239kcal
Author: Jenn Sebestyen
INGREDIENTS
1 tablespoon olive oil
1 shallot minced
2 cloves garlic minced
1 teaspoon dried rosemary
1 cup wild rice blend rinsed and drained
2 3/4 cups low-sodium vegetable broth
juice of 2 mandarin oranges about ¼ cup
1/2 cup dried cranberries
1.5 tablespoons pure maple syrup
1 tablespoon tamari
1 tablespoon Dijon mustard
1/4 teaspoon salt
1/3 cup chopped pecans toasted, if desired
INSTRUCTIONS
1. Heat the oil in a pot over medium heat on the stove. Add the shallots and garlic and sauté until soft and translucent, about 3 to 4 minutes.
2. Add the rosemary by crushing it between your fingers as you sprinkle it in. This releases the oils of the dried herb and makes it more flavorful. Sauté 1 minute until fragrant.
3. Add the rice, stir, and sauté about 2 minutes to toast the rice and bring out the nutty flavors.
4. Add the vegetable broth, mandarin juice, and dried cranberries. Stir and bring to a boil. Cover, reduce heat to medium-low and simmer for about 45 minutes, until all of the liquid is absorbed, and the rice is cooked through. Turn off the heat and let the rice sit, covered, for about 10 minutes before fluffing with a fork.
5. Meanwhile, in a small bowl, whisk together the maple syrup, Dijon and tamari until smooth. Pour it into the rice mixture and stir until well incorporated.
6. To toast the pecans, add them to a dry non-stick skillet over medium-low heat. Cook, stirring frequently to prevent burning, for 3 to 5 minutes. You’ll know they’re done when
they turn a shade darker and become fragrant. Add the pecans to the rice and stir to combine.
7. Serve warm or at room temperature.
Notes
- • Place the rice in a fine mesh strainer and rinse it well under cold water until the water runs clear. This will remove some of the starch so the rice will be rice sticky.
- • Crush the rosemary between your fingers as you sprinkle it into the pot. This will release the natural oils, making it more fragrant and flavorful.
- • Drain off any excess liquid after the rice is tender.
- • Let the rice sit, covered, for about 10 minutes off of the heat after it has cooked. This will allow it to firm up a bit and become fluffier instead of sticky.
- • Toast the pecans to deepen their flavor and bring out the crunch.
Storage/Freezing
Store leftovers in an air-tight container in the fridge for 4 to 5 days.
You can even freeze this rice. Let it cool then spread it out onto a rimmed baking sheet and place in the freezer until frozen. Once frozen, transfer to freezer-safe plastic bags. Flatten the bag and squeeze all the air out. The rice should keep well for 3 to 4 months.
Source: https://www.veggieinspired.com/cranberry-pecan-wild-rice-salad

Gluten-Free Dairy-Free Pumpkin Bread With Maple Glaze
Spice up your fall with a loaf of this easy gluten-free pumpkin bread! This gluten- free dairy-free pumpkin bread recipe is as delicious as it is healthy, made with whole grain flour, less sugar than most, and no xanthan gum. You can swap in 1 tablespoon + 3/4 teaspoon golden pumpkin spice blend for all of the spices here. See notes for more variations.
PREP TIME: 20 minutes COOK TIME: 1 hour COOLING TIME: 1 hour 20 minutes
SERVINGS: 10 servings
INGREDIENTS
PUMPKIN BREAD: 1 teaspoon softened vegan butter or coconut oil, for the pan 1 1/3 cup (300 g) pumpkin puree 3⁄4 cup + 2 tablespoons (190 g) organic granulated sugar 2/3 cup (125 g by weight) sunflower oil (or other neutral vegetable oil) !”4 large eggs 1 teaspoon vanilla extract 1 cup (110 g) Bob’s Red Mill gluten-free oat flour 2/3 cup (105 g) Bob’s Red Mill sweet rice flour 2/3 cup (95 g) Bob’s Red Mill millet flour 3 tablespoons (22 g) Bob’s Red Mill tapioca flour 1 tablespoon baking powder 3⁄4 teaspoon baking soda 1 teaspoon fine sea or kosher salt 1 1⁄2 teaspoon ground ginger 1 1⁄4 teaspoon ground cinnamon
1⁄2 teaspoon turmeric (optional, mostly for color)
1⁄2 teaspoon packed freshly ground nutmeg
1/8 teaspoon ground allspice
MAPLE GLAZE: 4 tablespoons (55 g) vegan or dairy butter, melted
1⁄2 cup (60 g) powdered sugar, sifted if clumpy
3 tablespoons maple syrup big pinch salt if using unsalted butter
INSTRUCTIONS
PUMPKIN BREAD:
1. Position a rack in the center of the oven and preheat to 350oRub a 9×5 loaf pan with the butter or coconut oil and line the bottom and sides of the pan with two pieces of parchment paper cut to fit.
2. In a large bowl, whisk together the pumpkin puree, sugar, oil, eggs, and vanilla.
3. Place a mesh strainer over the bowl (or over a different medium-sized bowl) and sift in the oat, sweet rice, millet, and tapioca flours along with the baking powder, baking soda, salt, ginger, cinnamon, turmeric (if using), nutmeg, and allspice.
4. Whisk the dry ingredients into the wet ingredients until smooth.
5. Pour the batter into the prepared pan. Bake the pumpkin bread until a toothpick inserted near the center comes out with moist crumbs, 55 to 65 minutes. Check the loaf after 45 minutes and rotate if it’s browning unevenly or move it to the lower rack if it’s browning too quickly.
6. Remove the loaf from the oven and let cool for 20 minutes, then remove from the pan and let cool completely on a wire rack, about 1 hour.
MAPLE GLAZE:
1. While the loaf cools, make the glaze. Whisk together the powdered sugar, melted butter, and maple syrup until the mixture is smooth. Let cool until thickly pourable, about 20 minutes.
2. Place the pumpkin bread still on the wire rack on a large plate. Pour the glaze over the pumpkin cake letting it drip down the sides. We like to scoop up extra glaze that collects on the plate and slather it on slices of pumpkin bread.
3. Let the glaze set until firm (you can pop it in the fridge for 15 minutes to speed this up). Slice and enjoy.
4. Store this pumpkin bread covered at room temperature for up to 1 day or refrigerated for up to 4 days.
NOTES
To keep this recipe dairy-free, use a vegan butter in the glaze that you like the taste of. My favorite is Miyoko’s cultured vegan butter.
To make this with homemade winter squash puree in place of the canned pumpkin, cut a butternut (or other winter squash) in half lengthwise and leave the seeds in for now. Place the squash cut-side down on an oiled rimmed baking sheet and roast at 375oF until collapsing and super tender, 45 minutes or as needed. Let cool, scoop out the seeds and strings and discard (this is easier to do post-baking). Scoop the flesh into a food processor, and blend until super smooth. Refrigerate for up to 1 week or freeze for longer storage. I find that butternut squash tend to be the most consistent for baking as actual pumpkins can be watery and bland.
To substitute all-purpose wheat flour or gluten-free flour, omit all of the flours and tapioca and use 332 grams (about 2 1/3 cups) of all-purpose flour in its place. I haven’t tested this myself, so please leave a comment if you give it a try! GF AP blends are all different from one another, my favorite being Bob’s Red Mill 1 to 1 flour, which is based on sweet rice flour. Stay away from any flour that contains bean or quinoa flours as those can have a strong, unpleasant taste in sweets.
Nutritional values are for 1 of 10 slices.
NUTRITION
Calories: 420kcal
Saturated Fat: 3g
Fiber: 3g
Calcium: 90mg
Carbohydrates: 54g
Cholesterol: 65mg
Sugar: 26g Iron: 2mg
Protein: 5g Sodium: 383mg
Vitamin A: 5412IU
Fat: 21g
Potassium: 256mg
Vitamin C: 1mg
Source: https://bojongourmet.com/gluten-free-pumpkin-bread-maple-glaze/
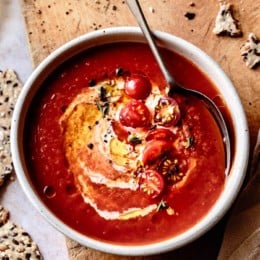
Creamy Vegan Roasted Tomato Soup
Fresh tomatoes roasted with onions and garlic form the backbone of this easy vegan roasted tomato soup recipe. Serve with a sandwich or salad for a nourishing late summer or early fall lunch or dinner.
PREP TIME: 10 minutes
COOK TIME: 50 minutes
TOTAL: 1 hour
SERVINGS: 6 servings
Ingredients
4 pounds ripe tomatoes, cut into large slices2 large yellow onions, peeled and cut into thick wedges
6 large garlic cloves, peeled
4 tablespoons olive oil
3/4 teaspoon fine or kosher sea salt (use less if your stock is salty)
1/2 teaspoon freshly ground black pepper
4-5 cups vegetable stock (or chicken stock or chicken bone broth for non-vegan)
1/2 cup full-fat coconut milk (or half and half or heavy cream for non-vegan)
1/2 teaspoon smoked paprika (optional)
a pinch of chili flakes (about 1/8 teaspoon)
Optional Toppings
extra virgin olive oil, cashew cream (see note), cherry tomatoes, fresh basil, thyme, or oregano, chili flakes
Instructions
1. Position racks in the upper and lower thirds of the oven and preheat to 375ºF.
2. Divide the prepared tomatoes, onion, and garlic among two rimmed baking sheets lined with parchment for easy clean-up, and sprinkle with the olive oil, salt, and pepper. Roast the vegetables until they are golden and soft, 35-45 minutes. Let cool to warm or room temperature.
3. Scrape the vegetables and their juices into a food processor, and blend until smooth.
4. Scrape the mixture into a large pot or dutch oven and stir in the stock (you may need more or less, depending on how juicy your tomatoes were), coconut milk, smoked paprika, if using, and chili flakes. Bring to a simmer, and cook, stirring occasionally, to meld the flavors together, 10 minutes. Taste, adding more salt if you like.
5. Ladle warm soup into bowls and top with a swirl of cashew cream, a drizzle of olive oil, cherry tomatoes, pinch of chili flakes, and/or fresh herbs.
6. Extra soup keeps well, cooled and refrigerated airtight, for up to 5 days. Or freeze for longer storage.
Notes
Soup recipe adapted from Honey & Jam.
To make an easy cashew cream for the topping, simply whisk together equal parts cashew butter and warm water, and season to taste with a little salt and lemon juice. Alternatively, blend soaked cashews with water until smooth and creamy, then season with salt and lemon juice.
See the post above for more serving suggestions!
If tomato basil soup is what you crave, stir a handful of chopped fresh basil into the soup at the very end, when it’s off the heat. Alternatively use a tablespoon of minced fresh oregano leaves or 1 teaspoon of fresh thyme leaves.
Nutrition values are for 1 of 6 servings (without toppings).
Calories: 203kcal Saturated Fat: 5g Sugar: 11g Iron: 2mg
Carbohydrates: 19g Sodium: 1016mg Vitamin A: 2976IU
Protein: 4g Potassium: 824mg Vitamin C: 45mg
Fat: 14g Fiber: 4g Calcium: 47mg
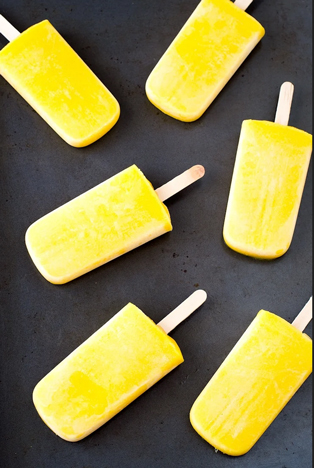
Mango Coconut Popsicles
These mango coconut popsicles are made with just 2 ingredients: mango and coconut milk. Popsicles are great to beat the heat and hydrate our body. Recipe makes 6 popsicles.
Ingredients
- • 2 cups diced fresh mango (460 g)
- • 1/2 cup coconut milk (125 ml)
Instructions
1. Blend the mango and the coconut milk in a blender until smooth.
2. Pour the mixture into the popsicle molds.
3. Freeze for 35 minutes and gently insert popsicle sticks.
4. Freeze until solid.
Nutrition
- • Serving Size: 1 popsicle
- • Calories: 79
- • Sugar: 8.2g
- • Sodium: 4mg
- • Fat: 5g
- • Saturated Fat: 4.3g
- • Carbohydrates: 9.4g
- • Fiber: 1.3g
- • Protein: 0.9g
Source: https://simpleveganblog.com/2-ingredient-mango-coconut-popsicles/
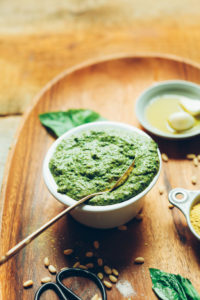
Easy Vegan Pesto – 5 minutes!
From the Minimalist Baker, here is the easiest vegan pesto in 5 minutes! Cheesy and flavorful despite being dairy-free, plus an option for lower oil/fat. It’s the perfect plant-based spread for Italian dishes and more!
Prep Time: 5 minutes
Total Time: 5 minutes
Servings: 16 1-Tbsp servings
Freezer Friendly: 1 month
Keeps in Refrigerator: 1 Week
Ingredients
- • 2 cups packed fresh basil (large stems removed)
- • 3 Tbsp pine nuts or walnuts (if nut-free, try sunflower seeds!)
- • 3 large cloves garlic (peeled)
- • 2 Tbsp lemon juice
- • 3-4 Tbsp nutritional yeast
- • 1/4 tsp sea salt (plus more to taste)
- • 2-3 Tbsp extra virgin olive oil*
- • 3-6 Tbsp water (plus more as needed)
Instructions
1. To a food processor or small blender, add the basil, nuts, garlic, lemon juice, nutritional yeast, and sea salt and blend/mix on high until a loose paste forms.
2. Add olive oil a little at a time (streaming in while the machine is on if possible) and scrape down sides as needed. Then add 1 Tbsp (15 ml) water at a time until the desired consistency is reached – a thick but pourable sauce. (If avoiding oil altogether, sub the oil with vegetable broth or just use all water.)
3. Taste and adjust flavor as needed, adding more nutritional yeast for cheesy flavor, salt for overall flavor, nuts for nuttiness, garlic for bite / zing, or lemon juice for acidity.
4. Perfect for adding to sauces, dressings, breads, and more! My favorite recently has been adding it straight to zucchini or carrot noodles (see photo) for a beautiful, healthy side dish.
5. Store leftovers covered in the refrigerator up to 1 week. After that, pour into ice cube molds, freeze, and store up to 1 month or more.
Notes
*I rely on a mix of extra virgin olive oil and water to make this pesto a “sauce.” If you’re trying to avoid oil, feel free to sub the EVOO for vegetable broth or water!
*Nutrition information is a rough estimate calculated with lesser amount of nutritional yeast. *Recipe as originally written makes ~1 cup pesto.
Nutrition (1 of 16 servings)
Serving: 1 one-Tbsp servings Calories: 39 Carbohydrates: 1.2 g Protein: 0.8 g Fat: 3.8 g Saturated Fat: 0.4 g Polyunsaturated Fat: 0.61 g Monounsaturated Fat: 1.6 g Trans Fat: 0 g Cholesterol: 0 mg Sodium: 32 mg Potassium: 62 mg Fiber: 0.7 g Sugar: 0.2 g Vitamin A: 317 IU Vitamin C: 1.95 mg Calcium: 13.24 mg Iron: 0.33 mg
Source: The Minimalist Baker (minimalistbaker.com)
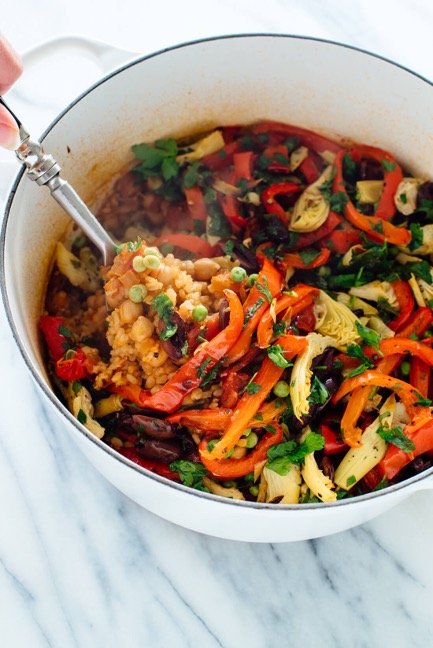
Vegetable Paella
Paella is a traditional rice dish from Valencia, Spain. Usually, they are made with seafood and meats, however there are vegetable versions. Give this one a try!
• Author: Cookie and Kate
• Prep Time: 15 minutes
• Cook Time: 60 minutes
• Total Time: 1 hour 15 minutes
• Yield: 6 servings 1x
• Category: Main Dish
• Method: Baked
• Cuisine: Spanish
Ingredients
- • 3 tablespoons extra-virgin olive oil, divided
- • 1 medium yellow onion, chopped fine
- • 1 ½ teaspoons fine sea salt, divided
- • 6 garlic cloves, pressed or minced
- • 2 teaspoons smoked paprika
- • 1 can (15 ounces) diced tomatoes (preferably the fire-roasted variety), drained
- • 2 cups short-grain brown rice*
- • 1 can (15 ounces) chickpeas, rinsed and drained, or 1 ½ cups cooked chickpeas
- • 3 cups vegetable broth
- • ⅓ cup dry white wine** or vegetable broth
- • ½ teaspoon saffron threads, crumbled (optional)
- • 1 can (14 ounces) quartered artichokes or 1 jar (12 ounces) marinated artichoke, drained
- • 2 red bell peppers, stemmed, seeded, and sliced into long, ½”-wide strips
- • ½ cup Kalamata olives, pitted and halved
- • Freshly ground black pepper
- • ¼ cup chopped fresh parsley, plus about 1 tablespoon more for garnish
- • 2 tablespoons lemon juice, plus additional lemon wedges for garnish
- • ½ cup frozen peas
Instructions
1. Arrange your oven racks in the upper and lower thirds of the oven, making sure that you have ample space between the two racks for your Dutch oven. You’re going to need a large Dutch oven (preferably 6 quarts/11-to-12” in diameter or bigger, although I got by with my 5.5-quart Le Creuset) or a large skillet with a snug-fitting lid (both must be oven-safe!).
2. Preheat the oven to 350 degrees Fahrenheit. Heat 2 tablespoons of the oil in your Dutch oven or skillet over medium heat until shimmering. Add the onion and a pinch of salt. Cook until the onions are tender and translucent, about 5 minutes.
3. Stir in the garlic and paprika and cook until fragrant, about 30 seconds. Stir in the tomatoes and cook until the mixture begins to darken and thicken slightly, about 2 minutes Stir in the rice and cook until the grains are well coated with tomato mixture, about 1 minute. Stir in the chickpeas, broth, wine, saffron (if using) and 1 teaspoon salt.
4. Increase the heat to medium-high and bring the mixture to a boil, stirring occasionally. Cover the pot and transfer it to the lower rack in the oven. Bake, undisturbed, until the liquid is absorbed, and the rice is tender, 50 to 55 minutes.
5. Meanwhile, line a large, rimmed baking sheet with parchment paper for easy cleanup. On the baking sheet, combine the artichoke, peppers, chopped olives, 1 tablespoon of the olive oil, ½ teaspoon of the salt, and about 10 twists of freshly ground black pepper. Toss to combine, then spread the contents evenly across the pan.
6. Roast the vegetables on the upper rack until the artichokes and peppers are tender and browned around the edges, about 40 to 45 minutes. Remove from the oven and let the vegetables cool for a few minutes. Add ¼ cup parsley to the pan and the lemon juice and toss to combine. Season with salt and pepper, to taste. Set aside.
7. For optional socarrat (crispy bottom—beware that you might have to scrub burnt bits from your pot later if you do this): Uncover the pot of baked rice, transfer it to the stovetop and cook over medium-high heat for about 5 minutes, rotating the pot as needed, until the bottom layer of rice is well browned and crisp.
8. Socarrat or not, sprinkle the peas and roasted vegetables over the baked rice, cover, and let the paella sit for 5 minutes. Garnish with a sprinkle of chopped parsley (about 1 tablespoon) and serve in individual bowls, with lemon wedges on the side.
Notes
Recipe significantly adapted from The Complete Vegetarian Cookbook by America’s Test Kitchen.
*Rice options: You can choose a different rice, but the baking time for the rice will vary according to the variety. White Valencia or arborio rice will be done baking at 25 to 35 minutes. Long-grain brown rice will be done baking at 55 to 60 minutes.
**Wine suggestions: I recommend using a dry, unoaked white wine, such as Sauvignon blanc or Pinot grigio. If you’re avoiding alcohol, just replace it with vegetable broth.
Source: https://cookieandkate.com/vegetable-paella-recipe/
Download Recipe pdf
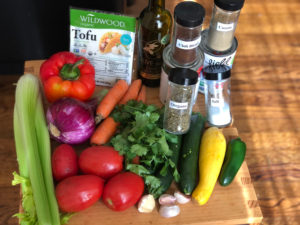
Tex-Mex Vegan Chili
By Shanta Nimbark Sacharoff
This is my friend Jim Sugarek’s vegan interpretation of his mom’s Tex-Mex chili recipe. The omission of meat makes this dish veg-friendly And the addition of tofu and more vegetables gives it a colorful and nutritional boost. Served with rice and/or tortilla this is a substantial meal.
One of the major ingredients in this dish is tofu. Tofu is a very nourishing soybean food product. Its nutritional profile is superb! Tofu is rich in protein, iron and calcium — all of these are important nutrients to maintain good health. And, unlike some more difficult to break down proteins such as beans, tofu is easy to digest. In addition, some research suggest that tofu is a safeguard against breast and prostate cancers. Tofu is a versatile food item due to its porous texture and bland flavor, so it can be incorporated into many foods and take on their flavors.
The vegetables going into this chili are also remarkably healthy. Celery support heart health and digestive functions. Zucchinis are a great source of vitamins A and C; both support our immune system. Carrots are good for our vision health. Lastly, tomatoes are a good source of vitamin A, C, E and K; all helpful in fighting diseases. In addition, the phyto-nutrients in tomatoes protect us from damage done by an excessive sun-light exposure.
14 to 16 oz. firm tofu, crumbled after draining excess water out (to measure about 2 cups)
1 tablespoon olive oil or any cooking oil
3 medium size Roma tomatoes or 2 large tomatoes
12 to 14 oz canned tomatoes (crushed or diced)
Or, — if not using fresh tomatoes
30 oz canned tomatoes (crushed or diced)
3 tablespoons of olive oil or any cooking oil
1 small or . big onion cut into very small pieces (feel free use food processor for this task)
2 cloves of garlic, minced
1 small or . large red or green bell pepper, cut into small pieces (to measure 1 cup)
2 to 3 stalks of celery sliced into strips and then cut into small pieces (to measure 1 cup)
2 small zucchinis or 1 small zucchini and 1 small yellow (crook neck) summer squash (to measure 1. cups)
I carrot sliced and then cut into small cubes (to measure 1 cup)
1 teaspoon each (or as needed) cumin powder and Mexican oregano
2 teaspoon Mexican chili blend
. teaspoon cayenne pepper (optional)
1 to 2 teaspoon salt as needed
1 to 1. tablespoons olive oil
2 tablespoons of all purpose flour (or gluten-free flour mix, use the finely ground variety)
Fresh cilantro leaves, chopped for garnish
Finely minced jalapeno pepper (as extra garnish for those who want a spicier chili)
First, allow the slab of tofu to rest, standing on a platter to drain some excess water. Next, crumble the tofu block into tiny pieces. Heat a tablespoon of oil in a heavy bottomed pan such as a cast iron skillet and add the crumbled tofu. Stir and cook for 6 to 8 minutes while scraping the pieces that stick to the bottom. When the tofu turns color and becomes somewhat dry, transfer to a platter, to prevent it from drying out too much. Set the tofu platter aside.
If using the mixture of fresh and canned tomatoes (which I prefer), boil the fresh tomatoes in a pot of water for a few minutes till their skins starts to split. Remove from boiling water and transfer the tomatoes in a bowl of cold water. Peel the tomatoes and chop them into small pieces collecting their juices, and place them in a sauce pot. Add the canned tomatoes along with its juices to the pot of fresh tomatoes. (If you are using all canned tomatoes, place them in a sauce pot along with its juices.) Cover and gently simmer the tomatoes for about 10 to 15 minutes.
While the tomatoes are cooking, heat the 3 tablespoon of oil in a large skillet or a wok and add the onions. Stir fry onions for two minutes and then add the garlic and cook them together for a minute. Next, add the bell pepper and saut. the mixture for two minutes. Then add celery, zucchini and carrots. Allow these vegetables to cook together for five minutes while stirring frequently. Then, transfer them onto a platter and set them aside.
Next, in a large sauce pot, combine the tomatoes and tofu. Cook together for 5 minutes stirring frequently and breaking any large lumps. Then add the stir-fried vegetables, the spices and a teaspoon of salt. Turn the heat down and allow the mixture to cook gently while attending to a final step of making a “roux” (cooking flour/oil together) to thicken the chili. To make the “roux”: Heat 1tablespoon of oil in a very small pot, over a low/medium heat. Slowly sprinkle the white flour (or the gluten-free mixture) using one hand, while stirring the mixture carefully and constantly with the other hand using a wooden spoon. Add a bit more oil as needed to makes a smooth, light roux that does not have any lumps. This process should only take 1 to 2 minutes. Quickly, add this oil/flour mixture (roux) to the pot of chili and stir with a wooden spoon to mix it thoroughly. Now the mixture should have formed a nice thick pot of chili. Taste the chili to adjust seasoning by adding more salt and spices as needed.
Garnish with chopped fresh cilantro. Place additional cilantro and minced jalapeno on the table for those who want an extra flavor and heat. Serve with rice and/or warmed corn tortillas.
Makes 6 to 7 servings
*****************************************************************************
Shanta is a Sunset District resident and the author of “Cooking Together” and “Flavors of India,” both available at Other Avenues Food Co-op., Green Apple Book Store, Rainbow Grocery Co-op, and at other local bookstores. Shanta writes recipes and articles on food. Shanta teaches cooking classes and does cooking demonstrations as well as lectures on food at public places such as the libraries. She shares her recipes via videos on YouTube. To view her cooking videos: https://www.youtube.com/results?search_query=shanta+nimbark+sacharoff’s
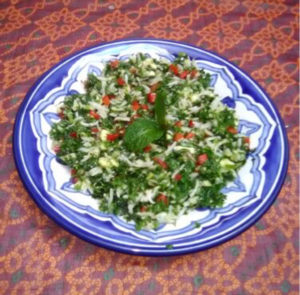
A Delightful Middle Eastern Salad: Tabouli, traditional and gluten -free
By Shanta Nimbark Sacharoff
This year, spring seems to have arrived early. It is important to keep our bodies hydrated during the coming months by drinking a lot of water and consuming more moist and raw leafy greens. Salads provide essential micro nutrients, such as vitamins and minerals as well as enzymes, which can help us with our digestion. Salads are a delightful and attractive addition to any meal. Most salads made with your familiar lettuce are easy and quick to prepare. But, for a variation, look for something different—an ethnic recipe that is diverse in composition. This Middle Eastern recipe called Tabouli, goes well with any lunch or dinner menu. And it is also an ideal companion for picnics and cookouts. You can find many variations of a tabouli recipe depending on what country it came from or simply what fresh ingredients are available. A traditional recipe of tabouli usually includes soaked bulgur (pre-cooked cracked wheat), finely chopped mint and parsley as well as other raw vegetables. The important aspect of this salad is to keep it very green with very finely chopped lots of parsley and mint. In this column, in addition to the traditional recipe made with bulgur, a wheat-free recipe is provided for those who are on a gluten-free diet.
Traditional Tabouli Ingredients for traditional tabouli:
½ cup bulgur (cracked wheat)
3 cups warm water
2 cups minced parsley leaves (after removing stems)
¾ to one cup fresh mint leaves, minced (after removing stems)
½ cup finely chopped scallions (with some of its green parts)
½ cup very small cubes of peeled cucumber
½ cup small cubes of firm tomatoes (chopped cherry tomatoes work well) ¼ cup red or yellow bell pepper, cut into tiny pieces
For Dressing:
3 tablespoons olive oil
3 tablespoons lime or lemon juice, freshly squeezed ½ teaspoon fresh minced oregano
½ teaspoon or to taste salt
Freshly ground black pepper to taste
Soak the bulgur in warm water for ½ hour. Wash and drain parsley and mint leaves thoroughly. Discard their rough stems. Using a wide-bladed knife, chop the leaves very finely. You can use a food processor for this task, but be careful not to over-process or else the leaves will be pureed. Prepare the rest of the vegetables as described above, making sure they are chopped into tiny pieces. Set the leaves and vegetables in a large bowl. Drain the soaked bulgur completely by using a muslin cloth or by taking the grain one handful at a time and pressing with your hands to squeeze out as much water as possible. Add the grains to the greens and vegetables. Whisk together the dressing ingredients in a bowl or a jar. Add the dressing to the grains, greens and vegetables mixture. Mix everything thoroughly but gently. Serve tabouli at room temperature with wedges of pita bread or crackers. You can also refrigerate tabouli for later use.
Gluten-free Tabouli
Bulgar is a wheat product. So here is a gluten free version made with basmati rice. This recipe will make approximately two cups of cooked rice. You will only need ½ to ¾ cup of rice. The rest can be refrigerated to use for a future meal.
Ingredients for Gluten-free Tabouli:
For Rice:
1 cup water
½ cup basmati rice ½ teaspoon salt 1 teaspoon oil
To assemble Tabouli:
2 cups minced parsley leaves (after removing stems)
¾ to 1 cup fresh mint leaves, minced (after removing stems)
½ cup finely chopped scallions (with some of its green parts)
½ cup very small cubes of peeled cucumber
½ cup cut into tiny pieces of firm tomatoes (chopped cherry tomatoes work too) ¼ cup red or yellow bell pepper, cut into tiny pieces.
For dressing:
3 tablespoons olive oil
3 tablespoons lemon or lime juice, freshly squezed ½ teaspoon oregano, dried or fresh and minced ½ teaspoons salt or to taste
Freshly ground black pepper to taste
First, cook the basmati rice. Boil the water in a saucepan. Rinse and drain the rice thoroughly, then add to the boiling water. Stir the grains and bring the water to a second boil. Then turn the heat down to low, cover and cook the grains for 12–15 minutes until all the water has been absorbed. Keep covered for five minutes. Then open the pot and spread out ¾ cup of the cooked grains onto a platter to cool for 30 to 45 minutes. You can refrigerate the rice to speed the cooling process (left over, day-old rice works fine for this recipe). Prepare the leafy greens and rest of vegetables as described in the list, following the instruction from the traditional tabouli recipe above. Also, prepare the dressing following the same instruction. Place the leafy greens and vegetables in a mixing bowl. Add the cooled rice. Drizzle and mix enough dressing to glaze tabouli, but do not drench it (leftover dressing—if any—can be saved for later). Serve the tabouli right away or refrigerate in a covered bowl until ready to serve.
Makes four to six servings
Recipe is modified from Shanta’s cook book “Cooking Together: A Vegetarian Co-op Cookbook”, Copyright © 2017 by Shanta Nimbark Sacharoff Shanta Nimbark Sacharoff the author of “Cooking Together” and “Flavors of India”. Both cookbooks are available from CCFC (contact Paula) or at Other Avenues Food Store and Rainbow Grocery Coop in S.F. Shanta writes recipes and articles on food and nutrition. She teaches vegetarian cooking classes in the Outer Sunset, SF. You can view Shanta’s recipes on youtube by clicking Shanta Nimbark Sacharoff’s youtube videos.
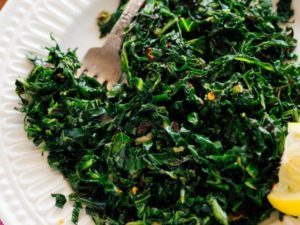
Vegan Southern Collard Greens
Favorite family recipe for collard greens made WITHOUT chicken broth and
smoked meat. It’s healthier but don’t expect to have to sacrifice taste!
Cook Time: 1 hour 20 minutes
Total Time: 1 hour 20 minutes
Author: divascancook.com
Ingredients
1/2 small yellow onion diced
3 cloves garlic minced
2-3 cups vegetable broth I only used 2 cups
1 teaspoon applewood smoked salt or any kind of smoked salt
1/2 teaspoon red pepper flakes
2 lbs collard greens
black pepper
hot sauce
Instructions
- Coat a large deep skillet or pot with vegetable oil.
- Saute onions until almost tender over medium heat and then add in garlic.
- Cook until onion and garlic are fragrant, about 2-3 minutes.
- Add in vegetable broth.
- Season broth with smoked salt and red pepper flakes.
- Taste and adjust the seasonings if needed. Make sure it’s to your liking because this is how
your greens will taste. - Bring to a simmer and reduce heat.
- Add in the greens. Green will wilt down as they cook.
- Simmer for 1 hr to 1 hr 30 mins. Do not boil. Add more vegetable broth if needed. May need
more or less time so be sure to check them after 30-45 minutes. When done, greens will be
dark green, tender and will not have a raw taste. - Add in more smoked salt, black pepper, red pepper flakes and hot sauce, if desired. ( I always
do!) - Enjoy!
- Add hot sauce or vinegar if desired
Notes
~TIPS~ Any type of smoked salt can be used. Cooking time may vary. Add fresh tomatoes and red peppers if desired.
Download Recipe pdf
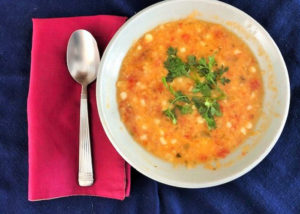
Dahl Soup
Cooking Together Recipe: Dal Chowder with Salsa
The word dal (also spelled daal or dahl) comes from the Sanskrit phrase “to split” and refers to a soup-like preparation of split peas, beans, or lentils, which are staples in Indian cuisine. The practice of milling beans to split them must have been invented by a culinary wizard, as split peas or beans are quicker to cook and easier to digest than whole ones.
The consistency of a dal varies according to its intended use. A thinner dal may be served as a first course, and a thicker more substantial dal, such as this one can be served as an entrée or a meal in itself. This dal chowder recipe was inspired by a co-worker who had had a dental surgery and asked me to prepare her a soft, nourishing soup at work. I invented this recipe, at the co-op, with minimal cooking facilities, limited time, and ingredients, including a left- over salsa from a previous day. This has become my favorite quick soup!
For Dal Chowder
4 cups water
1 cup red lentils, thoroughly rinsed with hot water and drained
1 tablespoon oil
1½ cup cooked tomato salsa (use the recipe below or any store-bought salsa)
1 tablespoon ginger root, finely chopped
1 cup corn kernels, fresh or frozen
Juice of ½ lemon
Salt to taste
Salt to taste
First prepare the cooked salsa. If you have a store bought or home- made salsa in the refrigerator that will do too. To prepare the salsa, place the tomatoes into a pot of boiling water for a few minutes until their skins split. Transfer them to a bowl of cold water, peel them after they cool and cut them into chunks. Place the tomato chunks, peppers, cilantro, onion and water into a jar of a food processor and blend the mixture into a coarse puree. Next, heat 1 to 2 tablespoon of oil in a saucepan and add the tomato puree mixture. Cook for 5 to 7 minutes until the sauce becomes somewhat thick. Add the salt to your taste. You will only need 1½ cup of salsa for this soup recipe. The remainder portion can be refrigerated for a future use.
To make the soup, bring the water to a boil in a pot and add the rinsed lentils. Simmer over medium heat for 15 minutes. Then whisk the lentils to break them down.
In a separate pan, heat a tablespoon of oil. Add the ginger and stir-fry for a minute. Next, add 1½ cup of the salsa and corn kernels to the pan and sautee for 2 minutes. Add this mixture to the pot of lentil. Simmer the soup for 5 -7 minutes. Add lemon juice and additional salt, if needed. Serve hot with rice, tortillas or bread.
NOTE: I like this soup with some texture. For very soft soup, puree the dal in a processor for 2 minutes. Serve hot.
Makes four to six servings
This recipe was modified from Shanta’s cookbook “Cooking Together: A Vegetarian Co-op Cookbook”.
Copyright © 2017 by Shanta Nimbark Sacharoff.
Shanta is a Sunset District (SF) resident and the author of “Cooking Together” &“Flavors of India”, both available at Other Avenues Grocery Cooperative on 3930 Judah Street. Shanta writes recipes and articles on food and nutrition. She also teaches vegetarian and vegan cooking classes and shares recipes videos via Youtube.
